We have listed all the maps of Valorant, the FPS game developed and published by Riot Games, for you....
See more

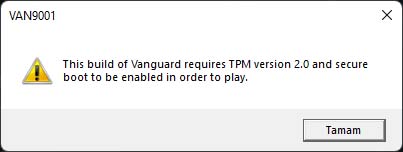
Valorant TPM 2.0 error is one of the most common errors in Valorant, among recent most-played first-person shooters. This error, which players encounter from time to time in the Valorant, can also be solved if the necessary steps are taken. But first of all, questions such as what is the Valorant TPM 2.0 error and why it occurs should be known.
It is possible for such errors to occur in most games played online. Mistakes such as Valorant TPM 2.0 have causes, codes, and appropriate solutions. In Valorant, the popular shooter game of recent times, players frequently encounter the Valorant TPM 2.0 error.
This error, which prevents players from playing the game, is usually experienced by players who switch to the Windows 11 operating system. In line with the fact that Windows 11 has not been officially released yet, it may occur that the operating system used by the player does not work stably. It is also quite simple to implement the solution to this error that prevents Valorant players from logging into the game.
Do you want to get unlimited enjoyment from Valorant after solving Valorant TPM 2.0 Error? So Buy Valorant VP right now!
Some players switched to this operating system with the arrival of the Windows 11 operating system, and as a result, they encountered the Valorant TPM 2.0 error. This problem is generally thought to be caused by the fact that the BIOS settings of the computers are not fully adjusted. To solve this problem, you need to follow the steps below.
With the new updates of Valorant, this error appears to occur in some players playing the game on the Windows 11 operating system. Although this error does not cover all players, it annoys the players who cannot log in to the game with the TPM error. It is natural to encounter this problem if you switch to the Windows 11 operating system and do not update the BIOS afterward. Here are the steps you need to follow to resolve this error:
The BIOS you are actively using may be an old version. After upgrading to an updated operating system or regularly, updating the BIOS version to the latest is very important. The BIOS update should be done for both the stable operation of your computer and compatibility with the new operating system. You should periodically check your motherboard brand's website to see if a new BIOS version has been released.
First, log into the BIOS settings. Then you should change the Secure Boot feature to Enable from the Security section, save the settings and restart your computer.
How you do this is essential when upgrading your computer to Windows 11. The TPM 2.0 feature will be turned on if you do it usually. However, if you have upgraded using different methods, you will likely receive the TPM 2.0 required error. To determine if your computer has TPM 2.0 support, enter the run section, type “tpm.msc,” and press OK. If you see that TPM 2.0 is turned off in this section, open the Security tab in the BIOS settings, enable the "Trust Technology" setting, and restart the computer.
Secure Boot is a UEFI (Unified Extensible Firmware Interface) feature that ensures that only trusted software with a valid digital signature is loaded during Boot. You must change your PC's UEFI firmware settings to enable Secure Boot.
To access the UEFI settings, restart your PC and press a key (usually F2 or Delete) during Boot. This will take you to the UEFI settings page. Find the Secure Boot option in the interface and enable it. You may also need to set the Boot Mode to UEFI Only. After making the changes, save the settings and restart the computer.
Once Secure Boot is enabled, you can install registered software and drivers without disabling this option again. To install unregistered software or drivers, temporarily disable Secure Boot.
If necessary, you may need to update your BIOS version to fix the TPM 2.0 error. You can follow the instructions below and update your BIOS settings in these cases. But remember, any mistake while updating the BIOS settings can render your computer unusable. Do not hesitate to get help from an expert in this regard.
That's the deal. However, it should not be forgotten that the BIOS update stages may differ from manufacturer to manufacturer. Be careful and avoid irreversible mistakes.
We have listed all the maps of Valorant, the FPS game developed and published by Riot Games, for you....
See more

We have compiled the most enjoyable games that are undervalued and discarded....
See more